Optimising archival JP2s for the derivation of access copies
Like many other organisations that are using JPEG 2000, the KB produces two representations of most of its digitised content (newspapers, books, periodicals):
- a high-quality, losslessly compressed JP2 that is the archival master;
- a lesser-quality, lossily compressed JP2 that is used as an access image (this is used for e.g. our newspapers website).
The majority of our digitisation work is contracted out to external suppliers, and both master and access images are typically derived from from a parent (TIFF) image, which is converted to JP2 using the settings for master and access images, respectively. This means that we’re not currently using the archival masters for producing derived images. However, there may be a need for this at some point in the future. For instance, we may need higher quality access images, or access images that give better performance in our access environment. Because of this, I was asked to take a further look into ways to derive access JP2s directly from our archival masters.
In this blog post I’ll be sharing some preliminary findings of this work, which may be of interest to other JPEG 2000 practitioners as well. All images and test results that I’ll be showing along the way are available from this Github repository, so you can have a go at these data yourself, if you’re so inclined.
Masters vs access images
To better understand the remainder of this blog post it is helpful to outline the differences between our masters and our access images. The tables below list the encoding-related specifications of both.
Specifications master
| Parameter | Value |
|---|---|
| File format | JP2 (JPEG 2000 Part 1) |
| Compression type | Lossless (reversible 5-3 wavelet filter) |
| Colour transform | Yes (only for colour images) |
| Number of decomposition levels | 5 |
| Progression order | RPCL |
| Tile size | 1024 x 1024 |
| Code block size | 64 x 64 (26 x 26) |
| Number of quality layers | 1 |
| Error resilience | Start-of-packet headers; end-of-packet headers; segmentation symbols |
Specifications access
| Parameter | Value |
|---|---|
| File format | JP2 (JPEG 2000 Part 1) |
| Compression type | Lossy (irreversible 9-7 wavelet filter) |
| Colour transform | Yes (only for colour images) |
| Number of decomposition levels | 5 |
| Progression order | RPCL |
| Tile size | 1024 x 1024 |
| Code block size | 64 x 64 (26 x 26) |
| Precinct size | 256 x 256 (28) for 2 highest resolution levels; 128 x 128 (27) for remaining resolution levels |
| Number of quality layers | 8 |
| Target compression ratio layers | 2560:1 [1] ; 1280:1 [2] ; 640:1 [3] ; 320:1 [4] ; 160:1 [5] ; 80:1 [6] ; 40:1 [7] ; 20:1 [8] |
| Error resilience | Start-of-packet headers; end-of-packet headers; segmentation symbols |
The main differences between the two are:
- access images are compressed lossily (reduced file size), whereas lossless compression is used for the masters;
- access images contain quality layers (enables progressive decoding), whereas the masters don’t;
- access images use precincts (optimises performance while panning across zoomed-in regions), which aren’t used in the masters either.
Methods
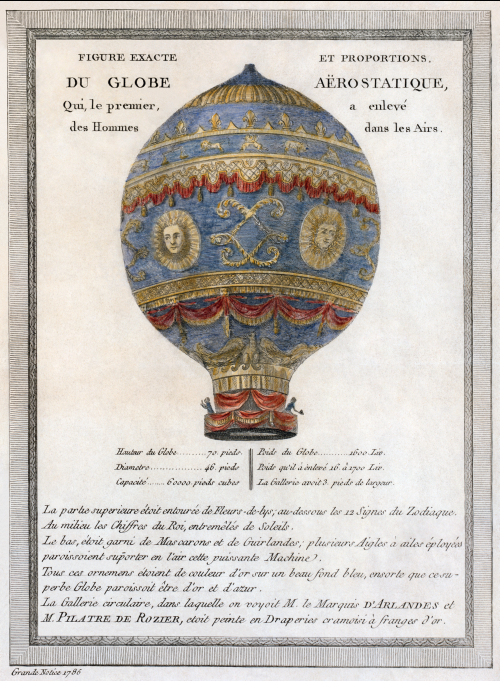
So, the central question here is: if we have an image that was encoded according to the master specifications, how can we derive an image from this that conforms to our access specifications? To find out, I did a number of tests on the image balloon_master.jp2, which was created according to the KB’s master specifications. It looks like this (surprise, surprise!):

I tried to derive an access image from this master using 2 popular JPEG 2000 software toolkits:
- Kakadu (v 7.2.2)
- Aware JPEG 2000 SDK (v 3.19.0.0)
For both software packages I limited myself to using only the pre-compiled binaries (i.e. the kdu_.. demo tools for Kakadu, and the j2kdriver command-line tool for Aware).
Kakadu
Kakadu’s kdu_compress tool doesn’t accept any of the JPEG 2000 formats as input; however, it does include a kdu_transcode tool which is capable of a wide array of reformatting operations. I should add here that kdu_transcode is primarily intended as a demo tool that showcases Kakadu’s codestream reformatting capabilities, and it doesn’t produce output in the JP2 format (for a detailed explanation by Kakadu’s author look here)1.
However, kdu_transcode is capable of wrapping output in a JPX container (which can be made JP2-compatible), so this is what I used for these tests. To keep things simple, I started out by instructing the tool to create an output image with a 20:1 compression ratio (ignoring any of the layer / precinct requirements). For an RGB image with 8 bits/component this corresponds to an equivalent bitrate of 1.2, so I ended up with the following command line:
kdu_transcode -i balloon_master.jp2 \
    -o balloon_access_kdu.jpf \
    -jpx_layers sRGB,0,1,2 \
    Sprofile=PROFILE2 -rate 1.2
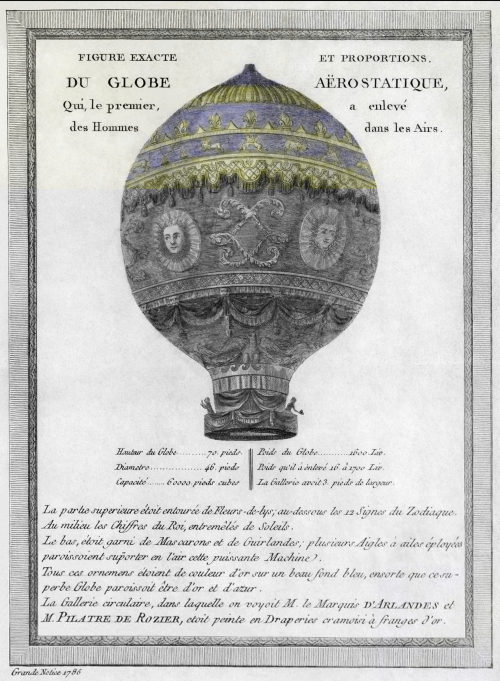
The resulting output image did have the expected size, but opening it in an image viewer revealed a problem:

Compared to the source image, most of the colour information has gone, resulting in a representation that is largely grayscale. The reason behind this seemingly unexpected result is fairly simple: when kdu_transcode creates the derived (lower quality) image, it does so by discarding some of the information that makes up the source image. In other words, it doesn’t decode and recompress the image, but instead re-arranges the compressed image data (which is a very fast process). For a source image with multiple quality layers, the result would be largely equivalent to discarding some of the highest quality layers. However, our source image only has one single quality layer, so this isn’t possible here. Instead, we end up with a result in which most of the colour information is missing (my guess is that the exact behaviour in such cases also depends on the progression order that was used for encoding the source image). Importantly, this is not a flaw of the tool, but simply a consequence of the way the source image was formatted upon its creation.
Aware
Aware’s j2kdriver tool supports encoding, decoding and reformating of JP2 images. I used the following command-line in an attempt to create a lossy access image (note that he -w switch sets the transformation to irreversible 9-7 wavelet, and the -R switch sets the target compression ratio to 20:1):
j2kdriver -i balloon_master.jp2 \
    -R 20 -w \
    I97 \
    -t JP2 \
    -o balloon_access_aw.jp2
This produced an output image that has the same size as the master! Similar to Kakadu’s kdu_transcode tool, j2kdriver makes no attempt at decoding and recompressing the source image in this case. However, the Aware tool does have a number of reformatting options, including one that allows you to discard quality layers. Needless to say, as the source image contains only one quality layer, this isn’t of much use in this case.
Optimising the archival masters for access generation
In order to produce access images from our current archival masters, we would need to fully decode the source images and then recompress them. Even though this is perfectly possible (e.g. we could simply convert each JP2 to TIFF and then compress that back to lossy JP2), this is both awkward and computationally expensive. A more elegant approach would be to take advantage of JPEG 2000’s ability to include multiple quality layers. We’re already using quality layers in our existing access images, but this is mainly to optimise performance for access. However, we can also define quality layers in the preservation masters, and we can do this in such a way that a subset of all the quality layers in the master become equivalent to the access image. Access images can then be generated by simply discarding one or more quality layers in the preservation master, without any need for re-compressing the whole image. Visually, this results in the following situation:

This is also the approach that Rob Buckley suggested in this 2009 report for the Wellcome Library. In this case we have a losslessly compressed master with 11 quality layers. Access images at a 20:1 compression ratio can then be derived by simply discarding the highest 3 quality layers.
Making it work
To make this all work, I first optimised the specifications of the preservation masters by incorporating the quality layer definitions from our access specifications, adding 3 further quality layers to accommodate for the higher quality that is produced by lossless compression. I also added precinct definitions, since we’re using those for access as well. This resulted in the following profile:
| Parameter | Value |
|---|---|
| File format | JP2 (JPEG 2000 Part 1) |
| Compression type | Lossless (reversible 5-3 wavelet filter) |
| Colour transform | Yes (only for colour images) |
| Number of decomposition levels | 5 |
| Progression order | RPCL |
| Tile size | 1024 x 1024 |
| Code block size | 64 x 64 (26 x 26) |
| Precinct size | 256 x 256 (28) for 2 highest resolution levels; 128 x 128 (27) for remaining resolution levels |
| Number of quality layers | 11 |
| Target compression ratio layers | 2560:1 [1] ; 1280:1 [2] ; 640:1 [3] ; 320:1 [4] ; 160:1 [5] ; 80:1 [6] ; 40:1 [7] ; 20:1 [8] ; 10:1 [9] ; 5:1 [10] ; 2.5:1 [11]* |
| Error resilience | Start-of-packet headers; end-of-packet headers; segmentation symbols |
Then I went back to that dreaded balloon image TIFF, and created a new lossless master that follows the optimised specifications (balloon_master_layers_precincts.jp2).
Generating the access image
Kakadu’s kdu_transcode doesn’t allow you to explicitly discard quality layers, but the -rate switch can be used to select an output bitrate, which has pretty much the same effect. So can can simply set all parameters to identical values as in our earlier example (remember that the 1.2 bitrate is equivalent to a compression ratio of 20:1 for an RGB image):
Kakadu
kdu_transcode -i balloon_master_layers_precincts.jp2 \
    -o balloon_access_precincts_kdu.jpf \
    -jpx_layers sRGB,0,1,2 \
    Sprofile=PROFILE2 \
    -rate 1.2
In contrast to our earlier test, the resulting image has a very good quality. Note that using kdu_transcode in this way produces output images that have the same number of quality layers as the source image (here: 11). However, in this case 3 are actually empty (i.e. the 4 highest quality layers are effectively identical). This is not a problem at all, it just means that progressive decoding of the image will result in an improved quality up to (and including) layer 8, with layers 9, 10 and 11 not adding anything on top of that.
Aware
Aware works differently in that it allows you to define explicitly which quality layers must be included in the output image. To get an access image with 20:1 compression ratio, we need to include the 4th best quality layer and anything below it (i.e. discard the 3 highest quality layers), which is done with the following command:
j2kdriver -i balloon_master_layers_precincts.jp2 \
    -ql 4 \
    -t JP2 \
    -o balloon_access_layers_precincts_aw.jp2
Note that instead of decoding images by quality layer, it is also possible to do this by resolution level. This can be useful if derived images at a lower resolution are needed. Both Kakadu’s kdu_transcode and Aware’s j2kdriver application are capable of this, provided that the master images contain a sufficient number of resolution levels (which is controlled by the number of decomposition levels at the encoding stage).
Conclusions
Careful selection of how JP2 preservation masters are generated can greatly facilitate the derivation of access images at a later stage. Tests with images that follow the KB’s current master specifications showed that lossy access images could only be derived by fully decoding and re-compressing them. Though not necessarily a problem, a more efficient approach would be to make better use of quality layers. This allows access images to be derived by simply extracting a subset of the master, without the need to decode or re-compress the source data. Tests with two widely used JPEG 2000 software toolkits (Kakadu and Aware) show that using this approach the process of deriving access images is both simple and efficient.
Acknowledgements
Thanks go out to David Taubman, whose reply to some of my questions on Kakadu’s transcode tool was largely the impetus for this blog post.
Useful links
- Dataset with all test images (Github link)
- Buckley & Tanner (2009): JPEG 2000 as a Preservation and Access Format for the Wellcome Trust Digital Library
Originally published at the Open Preservation Foundation blog
-
For most operational uses you would need to create a custom application using the full SDK. ↩
-
JP2
- Generating lossy access JP2s from lossless preservation masters
- Jpylyzer 2015 round-up
- Response to report on JPEG 2000 expert round table
- Six ways to decode a lossy JP2
- Jpylyzer software finalist voor digitale duurzaamheidsprijs
- Optimising archival JP2s for the derivation of access copies
- ICC profiles and resolution in JP2: update on 2011 D-Lib paper
- Automated assessment of JP2 against a technical profile
- Update on jpylyzer
- Jpylyzer documentation
- A prototype JP2 validator and properties extractor
- A simple JP2 file structure checker
- Paper on JPEG 2000 for preservation
- Ensuring the suitability of JPEG 2000 for preservation
-
jpeg-2000
- Generating lossy access JP2s from lossless preservation masters
- Jpylyzer 2015 round-up
- Response to report on JPEG 2000 expert round table
- Six ways to decode a lossy JP2
- Jpylyzer software finalist voor digitale duurzaamheidsprijs
- Optimising archival JP2s for the derivation of access copies
- ICC profiles and resolution in JP2: update on 2011 D-Lib paper
- Automated assessment of JP2 against a technical profile
- Update on jpylyzer
- Jpylyzer documentation
- A prototype JP2 validator and properties extractor
- A simple JP2 file structure checker
- Paper on JPEG 2000 for preservation
- Ensuring the suitability of JPEG 2000 for preservation


Comments